A common question in the JHipster chat room is “How to deploy to production?” Developers run into issues dealing with Docker, networking, monitoring, and more, especially when trying to run on a cloud service. JHipster helps out on several of those points (such as generated docker configurations), but choosing how and where to deploy to production is left up to the user.
For those unfamiliar, JHipster is an application generator that creates a complete and modern Web app, unifying Spring Boot and Spring Cloud Netflix on the Java side, and Angular and Webpack on the front-end. JHipster also handles all of the database creation, cache creation, comes Docker-ready, and more.
Rancher “is a complete, open source platform for deploying and managing containers in production.” It fits very well with JHipster, taking over in production where JHipster leaves off. Rancher orchestrates Docker containers across hosts and helps handle scaling and health checks for containers.
Demo Overview
This demo will go through the process of deploying a full JHipster microservices application to Amazon EC2. We’ll keep it simple by using the pre-generated JHipster sample applications. This means no coding is needed to see the JHipster microservices in action.
Project Generation
The sample apps we’ll be using are the sample gateway and sample microservice. The gateway uses a MySQL database and the microservice uses a PostgreSQL database. These dependencies will be configured through docker-compose. The sample apps are available at the below repositories and on Docker Hub as pre-built Docker images.
- Sample Gateway - Github - Docker Hub
- Sample Microservice - Github - Docker Hub
If we generated the apps locally, we could use yo jhipster:docker-compose to build a full docker-compose.yml containing all of the services and dependencies. This includes any databases chosen during generation and Elasticsearch if search is enabled. For this demo, I ran that command on the sample apps to generate several yml files. I combined the docker-compose.yml and jhipster-registry.yml files into a single docker-compose.yml for easier deployment on Rancher. The jhipster-registry.yml file includes the JHipster Registry which is used as a Spring Cloud Config server and for Netflix Eureka service discovery.
The final docker-compose.yml can be seen here. The changes I made from the generated configuration include:
- Removed the volume from the JHipster Registry config - needed for Rancher
- Uncommented the JHipster Registry’s git Docker environment variables to use the git repository as the config source instead of the local file system
- Changed the JHipster Registry’s profile to prod so it loads the config from the git repository
- Replaced the image fields with the pre-built Docker images hosted on Docker Hub
Project Deployment
Now that we have a docker-compose.yml set up and our Docker images hosted on a registry (Docker Hub), we can deploy through Rancher. You can install Rancher by running the docker container with docker run -d --restart=unless-stopped -p 8080:8080 rancher/server, or any method of your choice. You can also try a demo of it at https://try.rancher.com/ - though note I couldn’t deploy to EC2 from the demo for some reason.
Make sure Rancher is running and you’ve logged in. First, we need to define an Environment. For this demo, I used “JHTest” as the name. Rancher Environments separate hosts and stacks from other environments, allowing an easy separation between dev/prod and other projects.
The next step to deploying is creating a Host (under the Infrastructure tab). Rancher offers a variety of pre-configured options such as AWS EC2, Azure, Digital Ocean, and Packet. Entering an API key for one of those accounts will allow Rancher to provision the servers and install Docker on them. I’ve recently seen some questions regarding deploying JHipster microservices to AWS so I will use that for this demo. If you aren’t using AWS, choose a host and find your API key. You can also add a host manually.
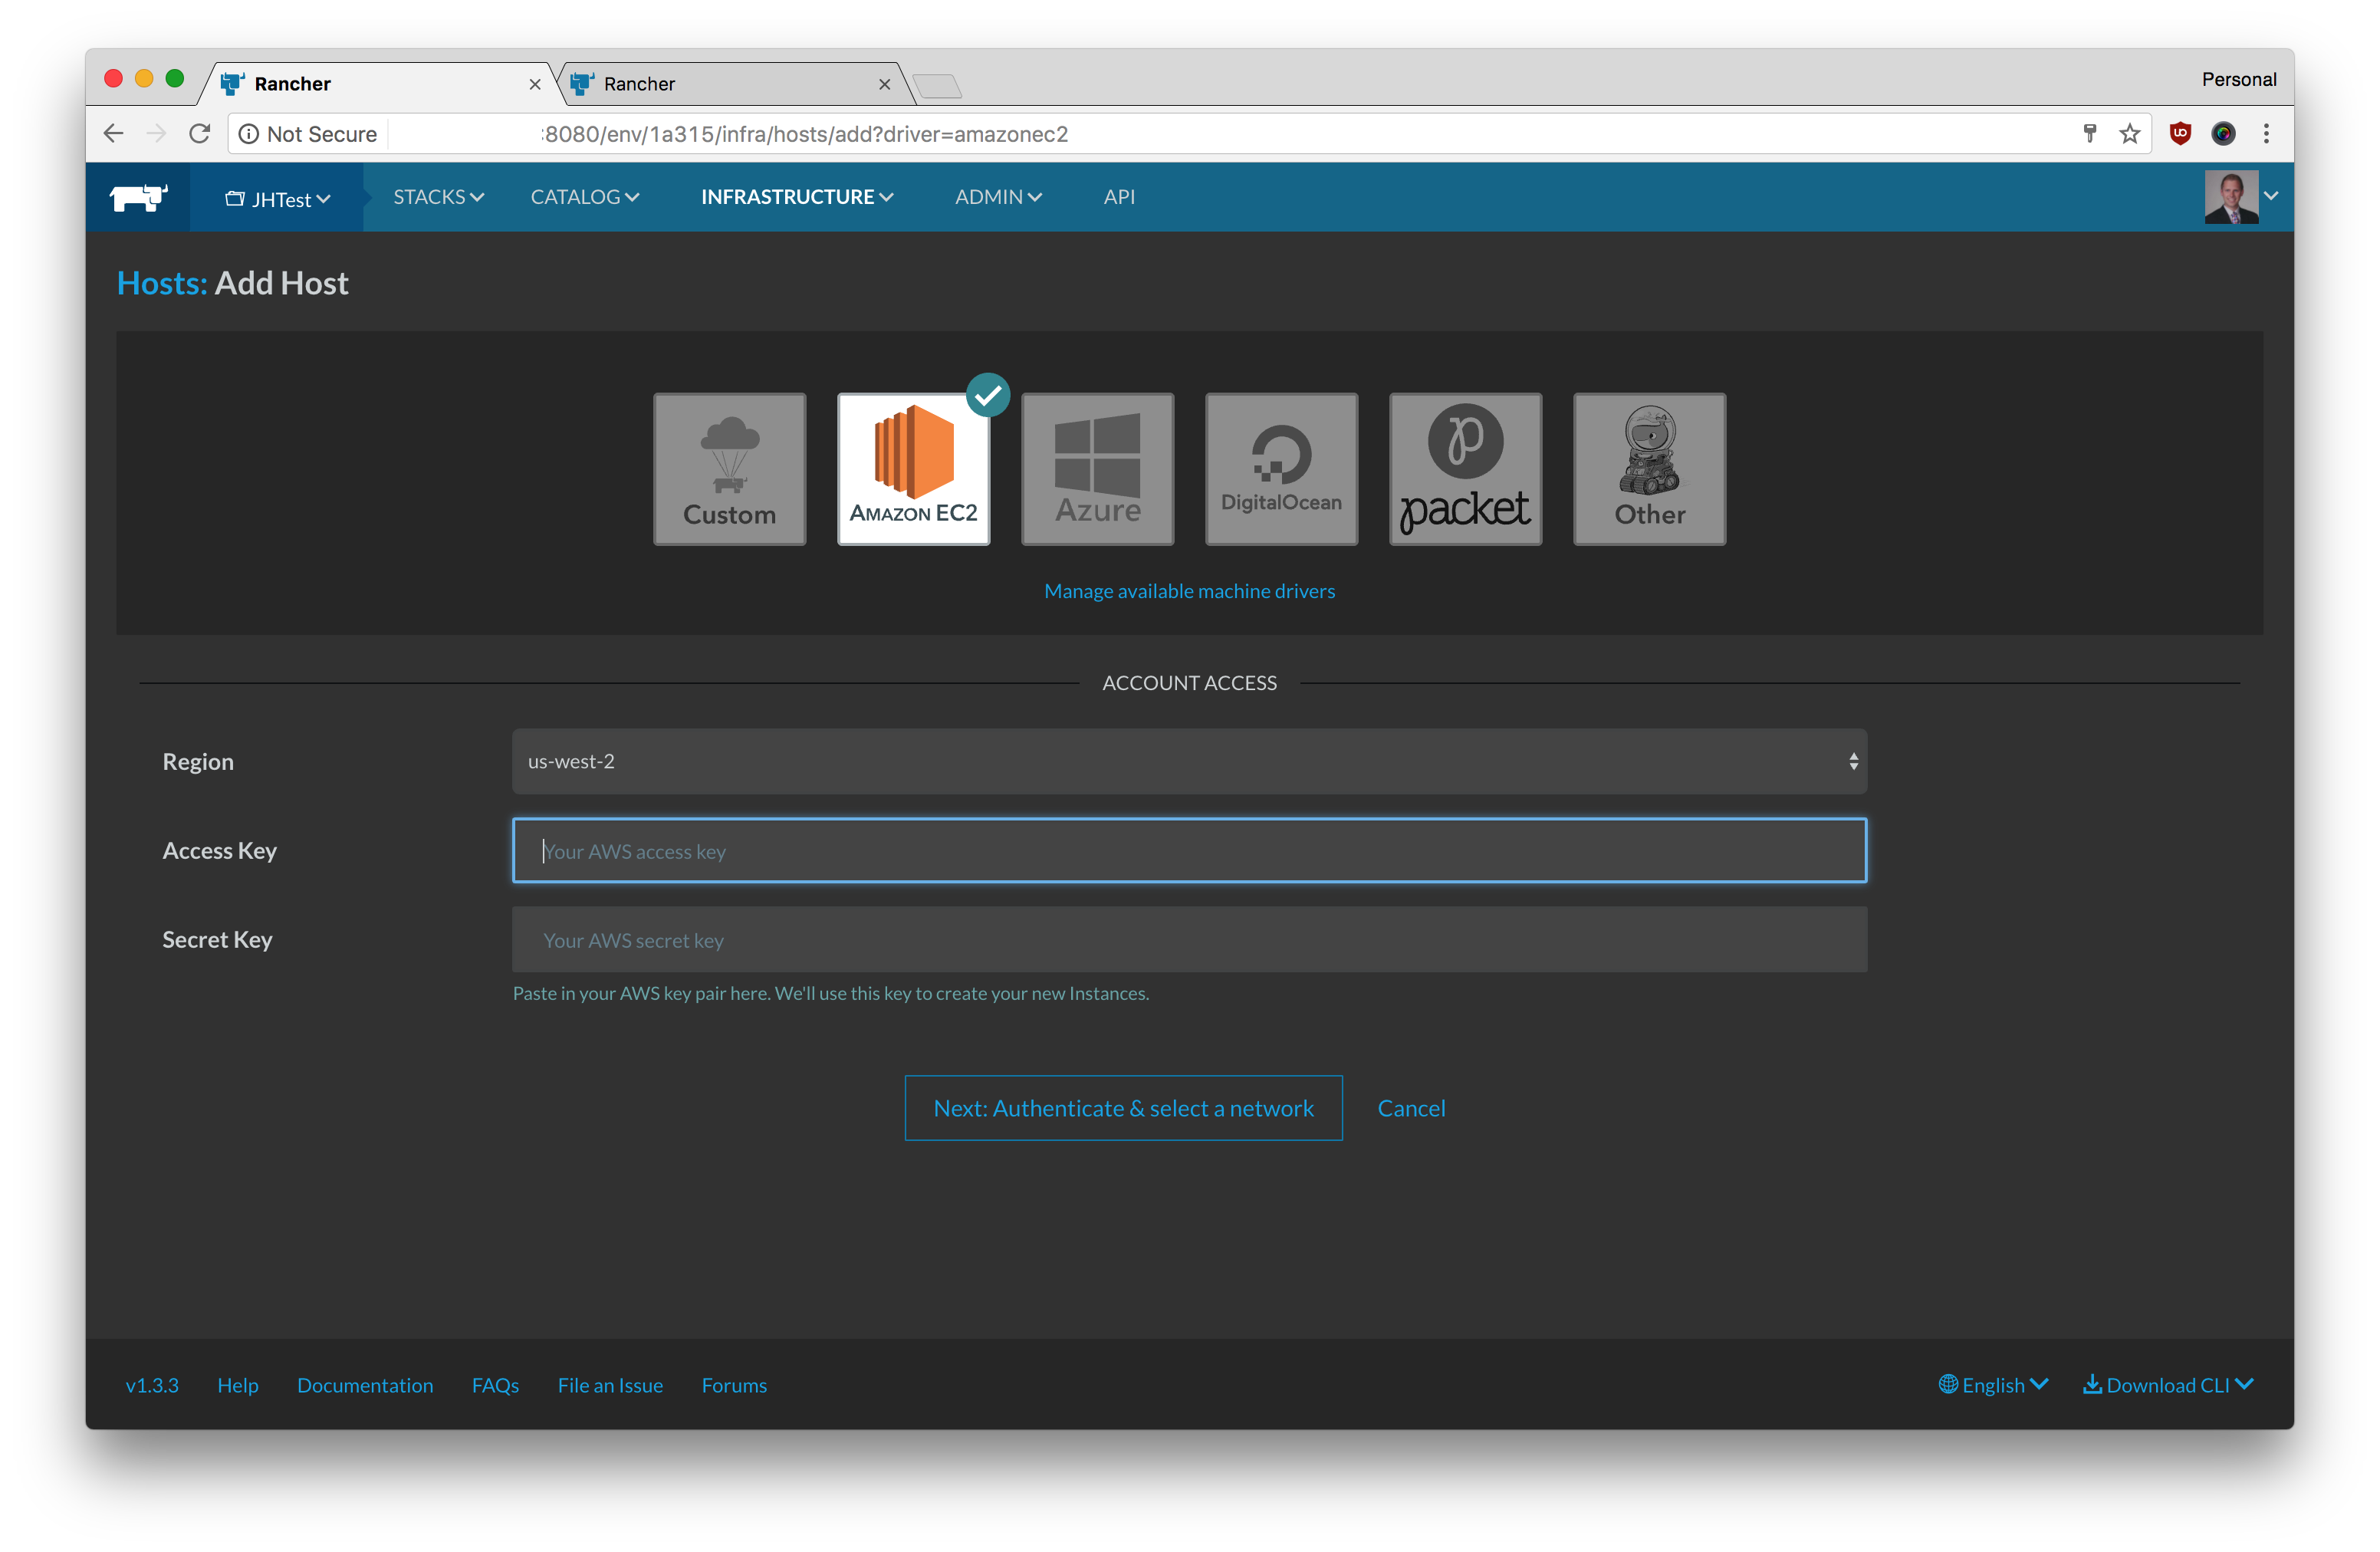
Fill out your AWS API Key and Secret, choose your region, network, select your VM sizes and count, and click deploy. Along with installing Docker, Rancher also sets up the network management and runs a container scheduler for restarting failing containers. It will take a few minutes for each host to get ready.
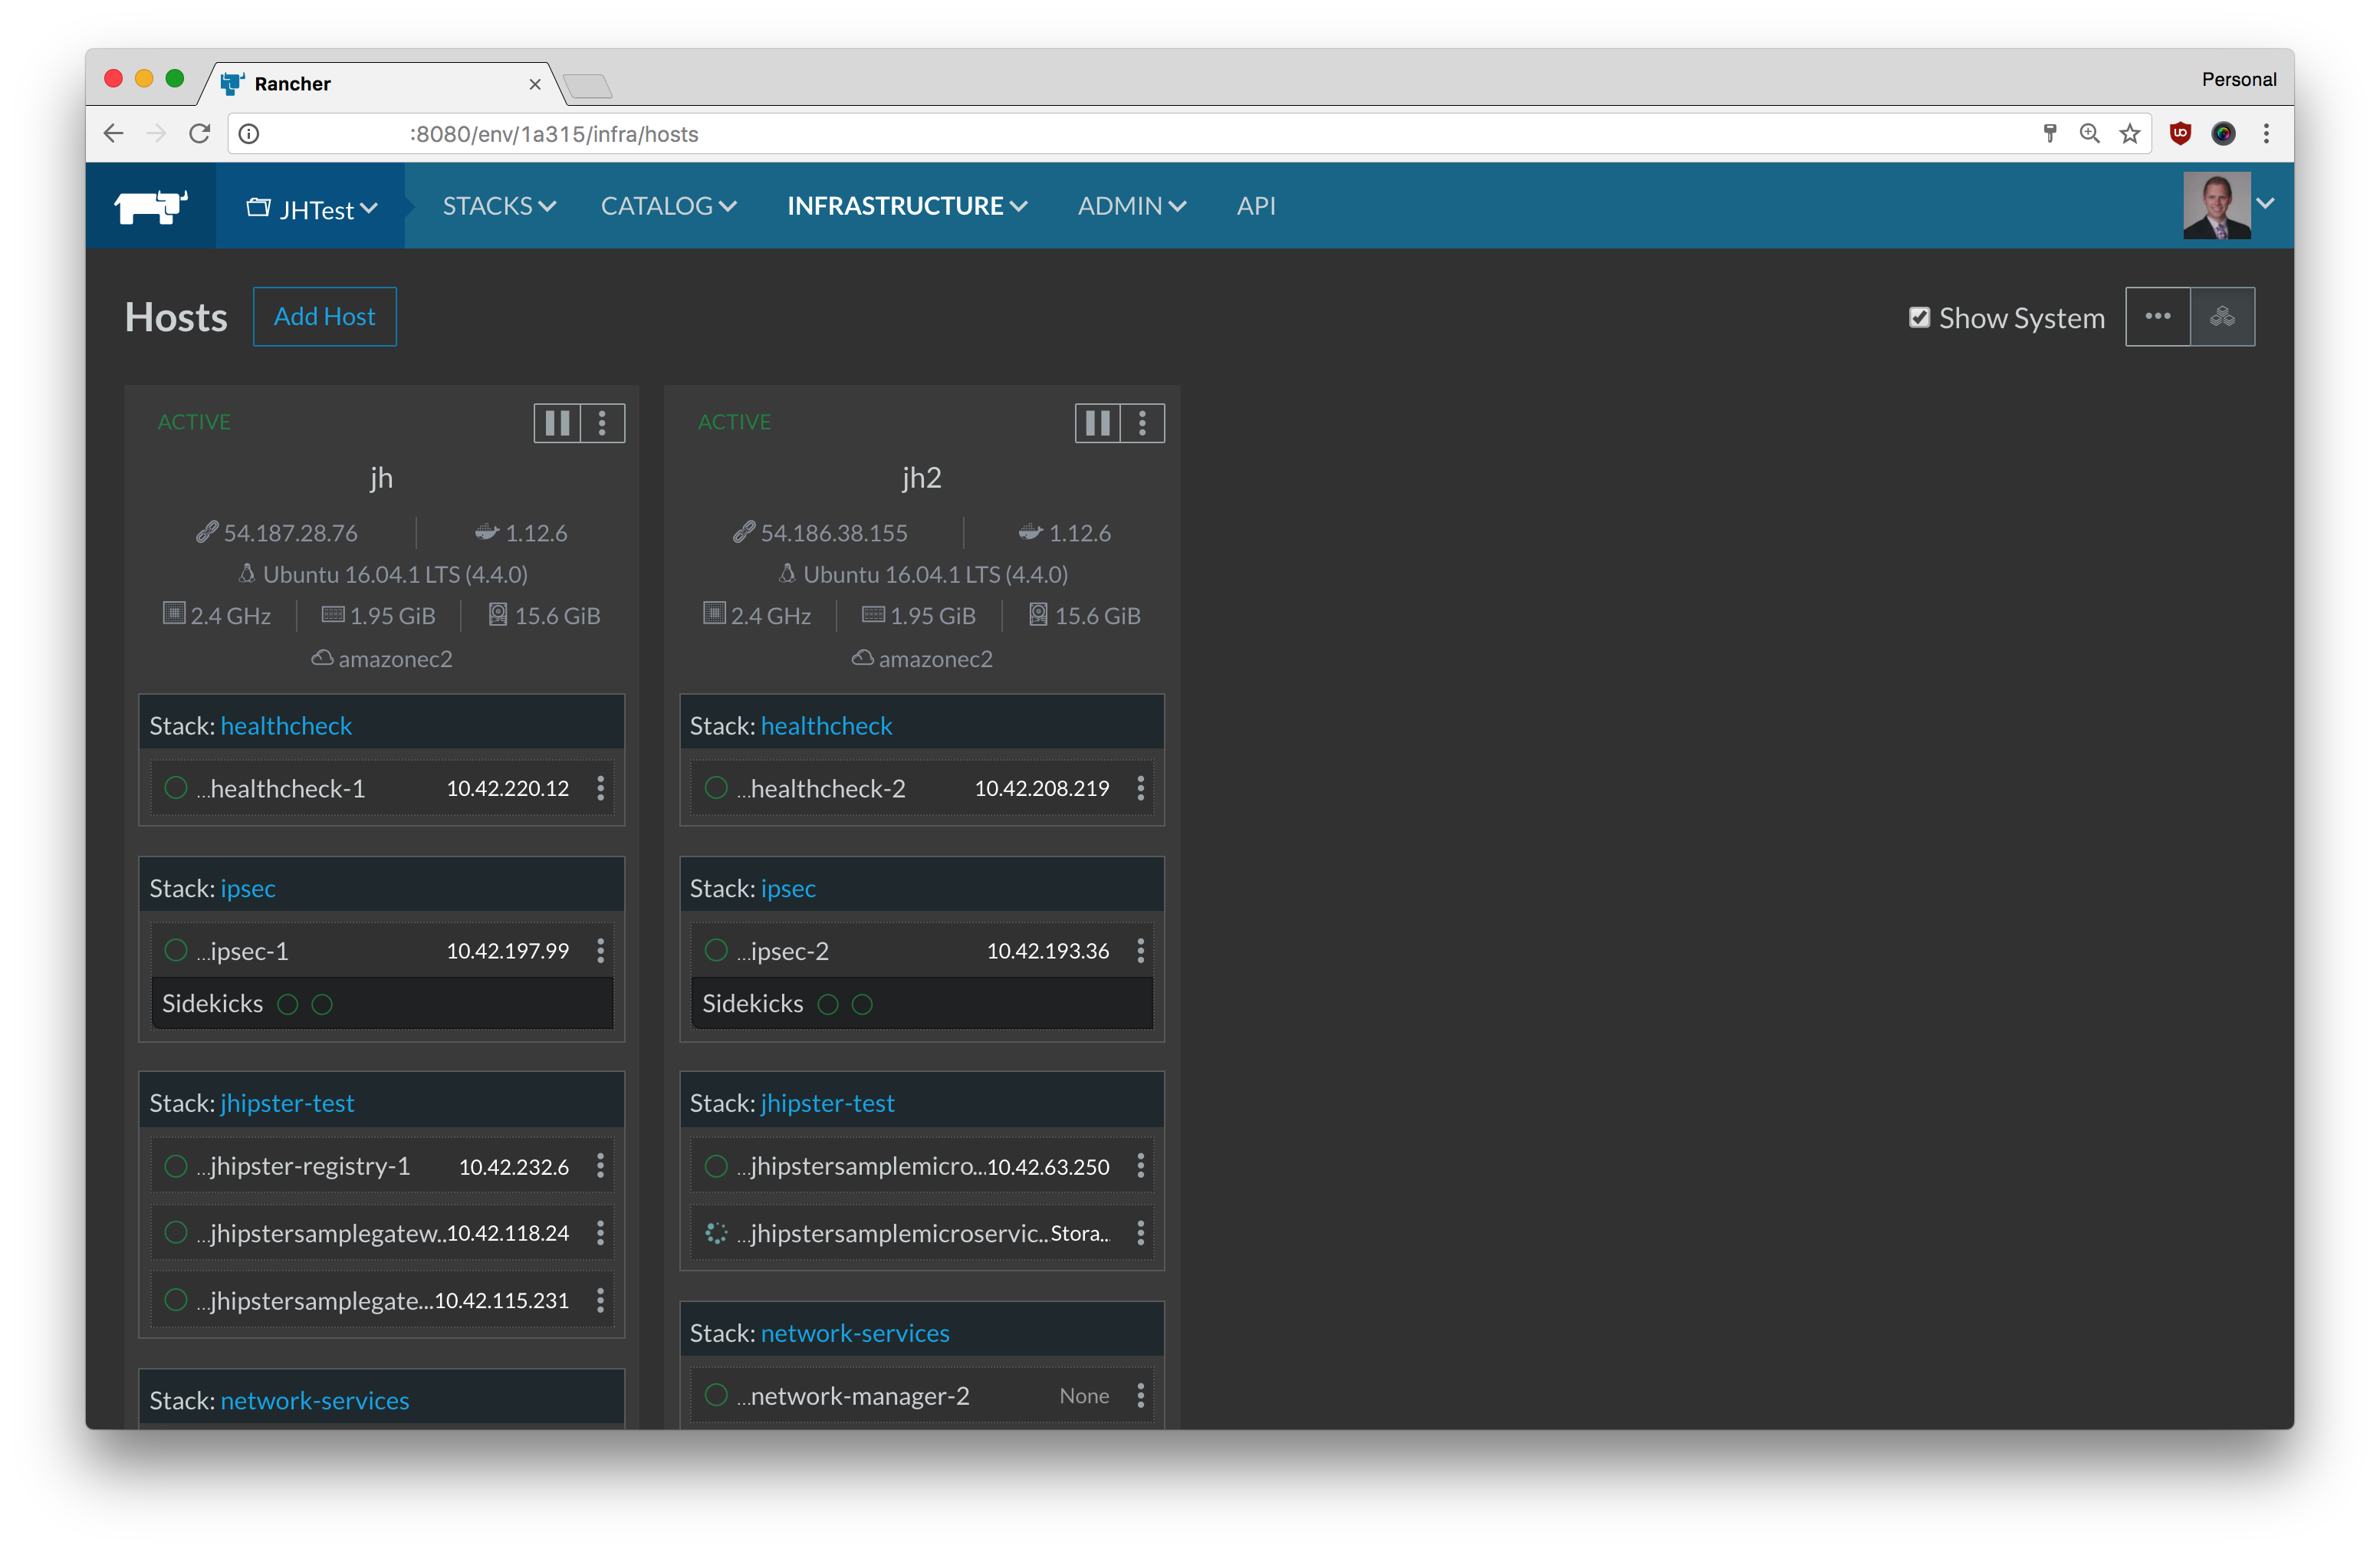
Deploying the services is simple. Switch to the Stacks tab, choose Add Stack, and give it a name of your choice. Copy the docker-compose.yml from the linked gist and paste it into the docker-compose.yml field. Click create, and wait a few minutes for the images to pull and deploy.

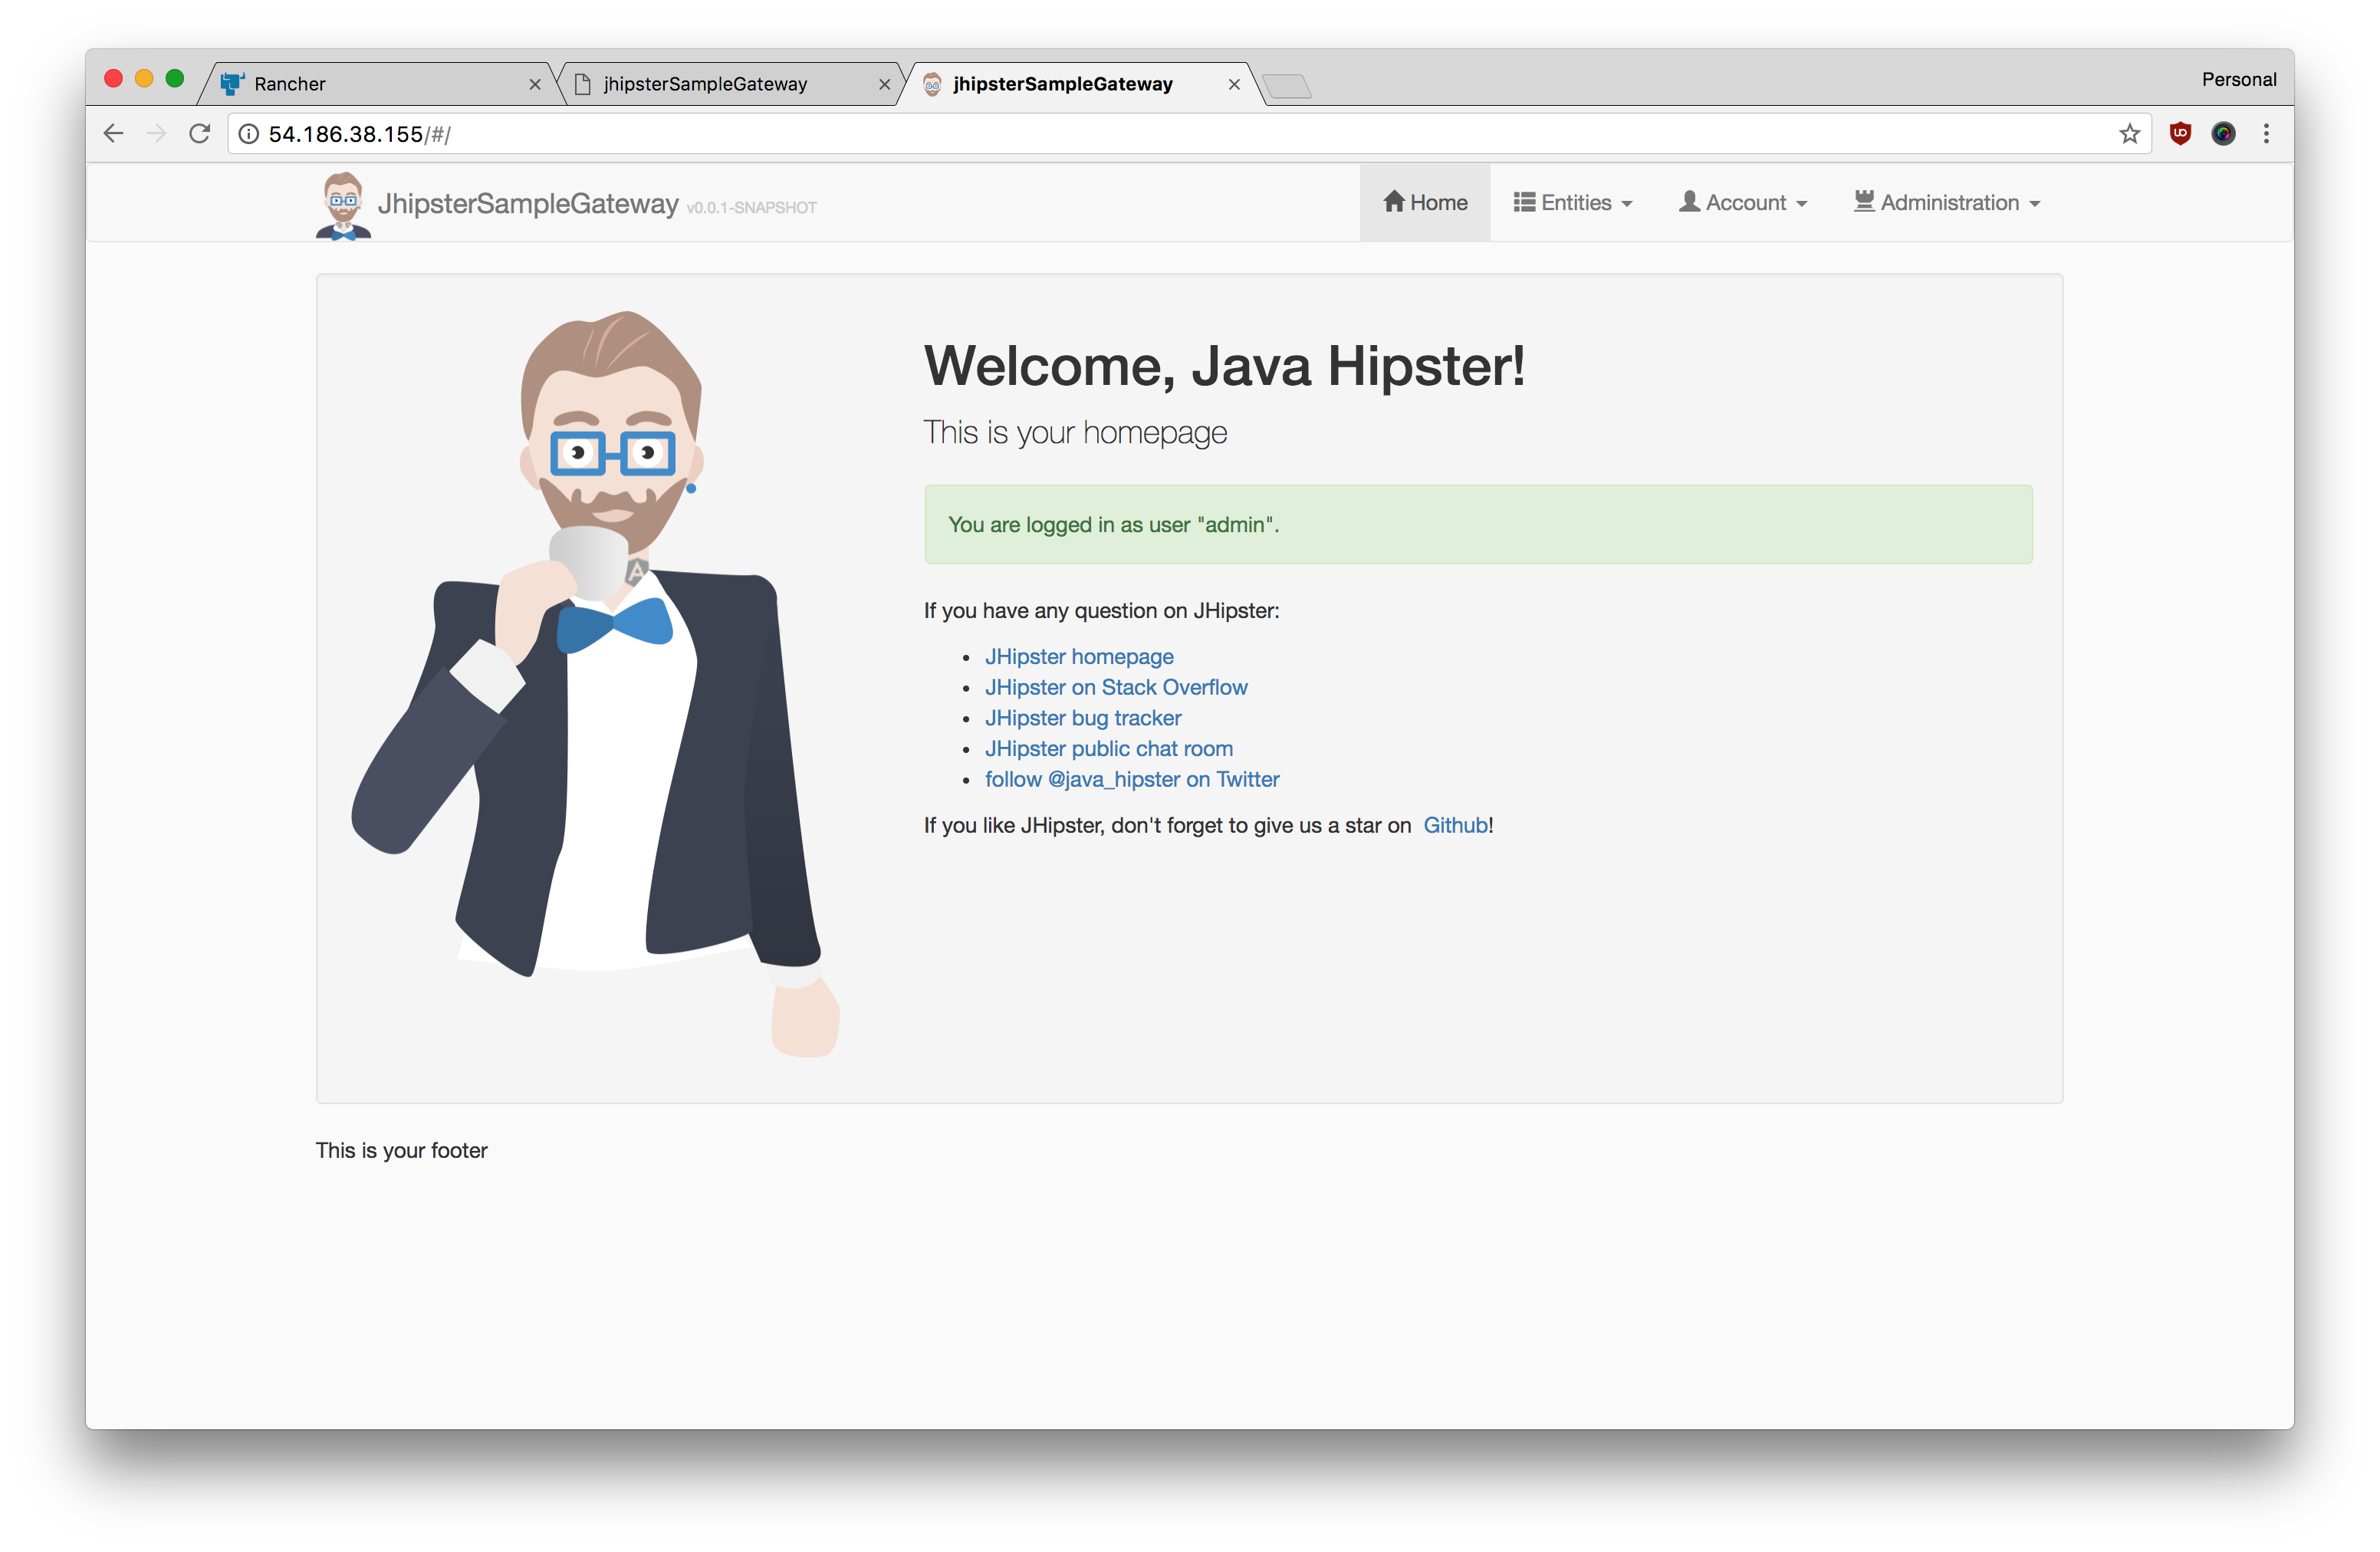
Congratulations, you’ve deployed JHipster microservices to the cloud without writing a single line of code! Once everything has started, you will be able to access it at port 8080 of the host running the jhipstersamplegateway container. You can also access the JHipster registry at port 8761 of the host running the jhipster-registry container. You can see the host’s IP addresses on the Host tab.
Other Rancher Benefits
- Load balancer - Access your apps at port 80 and balance requests among several containers
- SSL Configuration - Load balancers can terminate SSL for your apps. Upload your certificates through the Rancher GUI
- Private Docker Registries - Rancher lets you log in to any registry accessible to your
- Scaling - Rancher allows for easy scaling of containers. You can also set rules to run a container on each host, or a keep a certain number of containers running.
- Health Checks - Rancher will automatically replace failing containers if you set up the health check
- Rolling Upgrades - Upgrade containers with 0 downtime through a rolling upgrade
- Kubernetes support - Rancher also supports Kubernetets deployments, though I haven’t tried it out
As you can see, Rancher helps deploying apps to any environment. It keeps things simple and lets the developer focus less on the fine details of Docker and more on a stable deployment. In the upcoming weeks, there will be a special yo jhipster:rancher-compose generator that will handle even more of the configuration for the developer, including loadbalancers (Link to PR). Stay tuned!